
This is kind of a Hall Hollow-ish post because the kids did the project with me tonight, but because it's a how-to I'm sticking it here.
I did a set of these for myself the other Halloween, and I wore them this year to work.
A little girl liked them, so I said I would make some for her. I decided to do unicorn horns, one for her and one for her twin sister. They have long blond hair, I couldn't resist.
To make these you need:
Sculpey
Aluminum Foil
Toothpick
Ribbon
Heavy clear fishing line
Paint
Insane desire to have horns
You'll want two pieces of foil really, one to make a cone for the inside of your horns and one to protect your table from the sculpey and paint.
Start with a toothpick and a long sheet of foil, three feet should do for three to four inch horns. The toothpick is a placeholder for when you need to string the horn. You fold the foil several times until you have a strip. Then you place the toothpick perpendicularly about 1/3 of the way down the strip. You fold it over then wrap and twist the foil to make a horn with one or two wraps of the foil going below the toothpick and the rest making a cone on top of it. The foil core makes the horn bake evenly and prevents cracking. It's also cheaper than a wad of sculpey.
I form the cone and then flatten the base by shoving it into the table so it stands well and will sit flat on the skull. If you want a curve to the horn, now is the time to make it.
Roll out the sculpey into snakes and flatten the snakes. I use a roller and small strips of wood on each side so I have a nice even thickness, again, so it bakes well. The flat ribbon of clay is wrapped around the aluminum cone, and you put a layer of the clay on the bottom too. Smooth it all together then apply any decorative strips of clay you desire to make it pretty... or ugly... or gnarly.
Bake according to directions on the package. Remember that sculpey can be baked longer than recommended but NEVER hotter than recommended.
When cool enough to handle remove the toothpick. Paint and then thread in the fishing line. I make the line about the size of the head then tie a loop on each end. Then the ribbon is threaded through each loop and you can use it to cinch the horns on tight and tie the ribbon. You can also use a few bobby pins on the fishing line up top if you like.
Like I said, I did this today with my kids, ages (almost) 10, 8, and 6. I have been working very very hard on controlling that impulse to "fix" my kids projects. I still have to do most of the work for my 6 year old though because, well she's 6 and a bit spoiled.
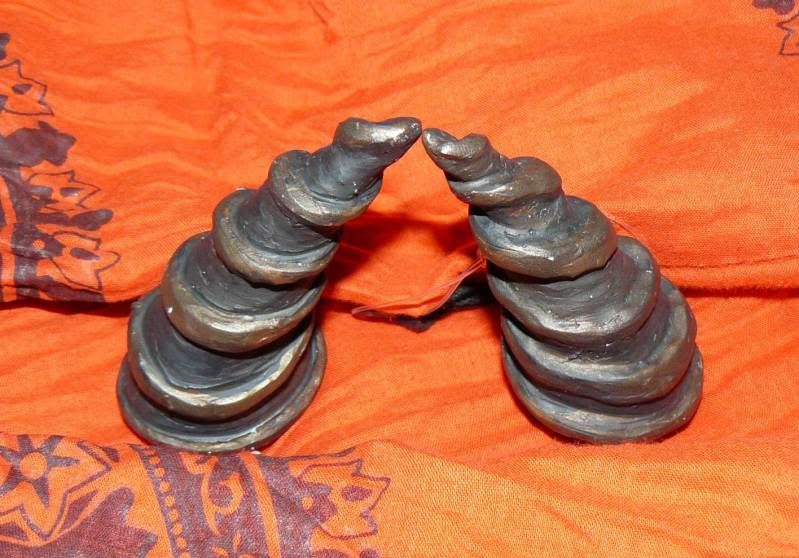
They are drying now and I just snapped a pic.

The two white ones are mine of course. The other one in the back is Jordi's. I ended up doing most of the work on hers, she put holes all over the place and painted it though. Jay's is the redwood-red and white one. Tali's is the bloody looking one.
I did a set of these for myself the other Halloween, and I wore them this year to work.
A little girl liked them, so I said I would make some for her. I decided to do unicorn horns, one for her and one for her twin sister. They have long blond hair, I couldn't resist.
To make these you need:
Sculpey
Aluminum Foil
Toothpick
Ribbon
Heavy clear fishing line
Paint
Insane desire to have horns
You'll want two pieces of foil really, one to make a cone for the inside of your horns and one to protect your table from the sculpey and paint.
Start with a toothpick and a long sheet of foil, three feet should do for three to four inch horns. The toothpick is a placeholder for when you need to string the horn. You fold the foil several times until you have a strip. Then you place the toothpick perpendicularly about 1/3 of the way down the strip. You fold it over then wrap and twist the foil to make a horn with one or two wraps of the foil going below the toothpick and the rest making a cone on top of it. The foil core makes the horn bake evenly and prevents cracking. It's also cheaper than a wad of sculpey.
I form the cone and then flatten the base by shoving it into the table so it stands well and will sit flat on the skull. If you want a curve to the horn, now is the time to make it.
Roll out the sculpey into snakes and flatten the snakes. I use a roller and small strips of wood on each side so I have a nice even thickness, again, so it bakes well. The flat ribbon of clay is wrapped around the aluminum cone, and you put a layer of the clay on the bottom too. Smooth it all together then apply any decorative strips of clay you desire to make it pretty... or ugly... or gnarly.
Bake according to directions on the package. Remember that sculpey can be baked longer than recommended but NEVER hotter than recommended.
When cool enough to handle remove the toothpick. Paint and then thread in the fishing line. I make the line about the size of the head then tie a loop on each end. Then the ribbon is threaded through each loop and you can use it to cinch the horns on tight and tie the ribbon. You can also use a few bobby pins on the fishing line up top if you like.
Like I said, I did this today with my kids, ages (almost) 10, 8, and 6. I have been working very very hard on controlling that impulse to "fix" my kids projects. I still have to do most of the work for my 6 year old though because, well she's 6 and a bit spoiled.
They are drying now and I just snapped a pic.
The two white ones are mine of course. The other one in the back is Jordi's. I ended up doing most of the work on hers, she put holes all over the place and painted it though. Jay's is the redwood-red and white one. Tali's is the bloody looking one.
2 comments:
Hmm. I guess the foil is folded across the width and not the length, so that you have a shorter (but relatively thick) piece to work with?
You have such a knack for doing these things, Sis. Are you going to make your own creche pieces this year?
Love ya!
I don't think it much matters which way you fold it...
As for the creche Joe bought me a bunch of balsa wood two years ago so I could finish off the set I started, but I don't know if I will.
I've got to do a statue in the next 9 days and I haven't even got a concept yet, sigh. Thinking thinking...
Post a Comment