
I'm evil. I just destroyed a set of encyclopedias to make boxes to hide my husband's "stuff". The worst part is, now I'm blogging about it, but that's just because people are asking me how to do it. Yes, you read that right, I'm
promoting the desecration of old books! I'm sorry Daddy, do you still love me? I SWEAR they had been molding in that thrift store for years... I know because I've been planning this for years... does that make me a bad person?
So if you now hate me on principle, I understand. I committed the crime and will have to live with the consequences. If you don't hate me though... well, here are instructions for your own act of desecration. Please read and understand before starting, I'd hate for any books to go to waste.
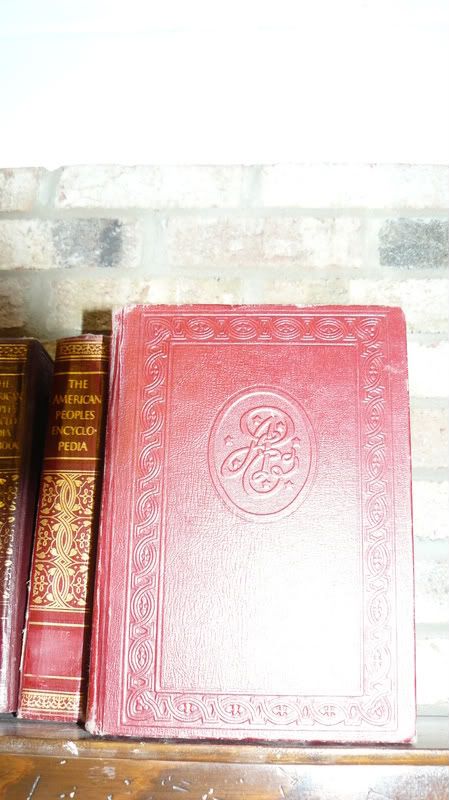
Step 1: find the perfect books to destroy. Thrift stores THROW AWAY encyclopedias, so you may have to ask your local one if they have any in the back, or if they have a call list for a set to be saved for you. Tell them you don't even care if it's an incomplete set... they will look at you weird, but hey... they won't forget you! Be sure that they are big enough to hide whatever it is you are hiding. So if it's dvd cases, get ones that are tall enough to hide the cases, etc.
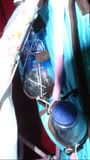
Step 2: Examine the set, open them up and bend the covers back (feeeeel the guilt. You may hear the voice of your first grade teacher echoing in your head, "That is NOT the way you are supposed to treat a book!") If the spine comes away from the bound pages, this set is perfect. If the cover is attached to the binding... it may still be usable... but the spine taken off will be weak, I bet you can pick out the spines like this in my first picture, they are wrinkled. Those are the "year books" that went with my set and weren't bound the same way. IF the pages fall out of the book you just abused THAT set is DESTINED for you, ask the clerk, she will agree.
Step 3: Once you have the books home, clear out the kids. Seriously, some of this a kid can do, some of this can harm a kid, and some of this a kid can really mess up by breathing on it. This is an evening job, or a kids are at school job, or a kids are locked in their rooms until Christmas job. It is not a nap time, I've got a few hours before dinner job.
Step 4: Divest the pages from the cover. Open up, slide one blade of the scissors between the bound pages and the spine, and cut through ONLY the paper that connects the cover to the pages. If you have the glued on spine kind,
carefully rip along the crease then peel away the fabric from the paper it is glued to.
Step 5: Recycle the pages... or use them to wallpaper a room... or glue them to a table and then paint polyurethane all over them so your kids can learn from something other than the cereal box during breakfast. (I told you I was evil.)
Step 6:Figure out how many spines to a cover. The easiest boxes are the ones that are one cover width wide. If the spines don't nicely cover the cover, you may need to trim the cover down with a utility knife so they fit with no gaps. Spare covers make good cutting mats, so you don't cut your table.
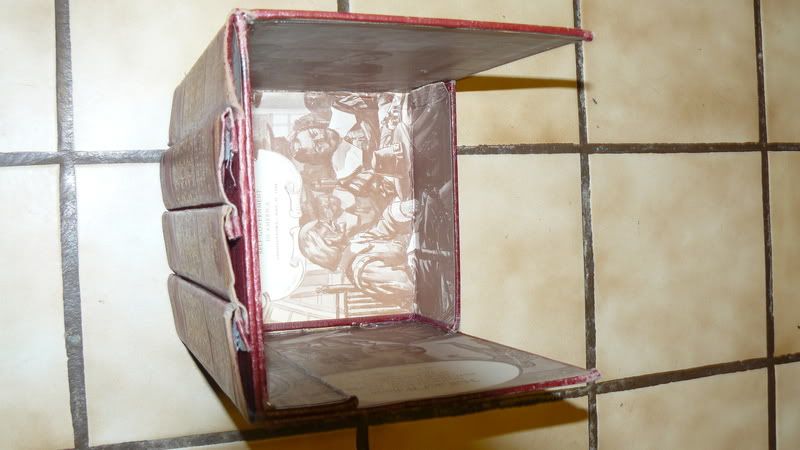
Step 7: Remove the covers from the spines, but not all of them. On each box you will need a front cover with spine still on and a back cover with spine still on. These go at the right and left sides of the box, so the still attached covers make the sides of the box. Their spines are still glued to the front of the box, but still being attached to the sides makes a pretty transition, like a book has. When gluing the sides on be sure to glue the cover edges together at the corner so the hard parts meet, not soft to hard. That way the box is stronger. Once you have the two sides glued on then fill the middle with just spines.  (see my lovely drawing below)
When cutting the covers off, cut through the fabric of the cover about 1/2 to an inch away from the spine and peel. This way you have more to glue under.
- When gluing, glue the spare cover on the sides of the spine, not the back sides of the spine. Folded under like that they look more like the original books (may they rest in peace.)
Hot glue works best, household glues take to long to dry and packing tape will degrade in a few years and flake away.
Step 8: Cut bottom and back. Decide if you want a full back or partial back. Loose items like game controllers need a full back, games and dvd cases can have only a short back. Take a spare cover, you now have plenty to choose from, and lay it on the table, take another cover and mark 1/8 inch short of the width of the cover along the length. So you have now drawn a line on one cover that makes a rectangle next to a square. The square is your box bottom. The rectangle can be scrap or a partial back. If it's scrap, cut it off, throw it out. If it's your partial back cut with your knife only about half way through the cover's depth and then bend it to a right angle with the board, less gluing! (See back on second and third pics for partial back.) If you want a full back grab a spare cover to glue in.
Step 9: Lay your box spines down. Let the sides (covers) lay to the side. Take your bottom and glue the edge to the very bottom edge of the center section. Then run a bead of glue up one side, bring the cover up, then repeat with the other. Last, squeeze a bead in on each side of back. (If you have a full back, do the bottom corner on back edge of bottom, press on top, glue up sides.)
Step 10: Examine spine side. Unless you are some freakishly super human forward thinker you are now noticing that you have a Q spine next to your B spine. Now everyone will think your encyclopedia's out of order and try to fix them. Then they will all find out you are a book slayer! OH NOOOOO!!!
Fear not fair maiden! Enlist the help of your non-acetone nail polish remover! Get your q-tips, and the nail polish remover. Dip the q-tip in the vile smelling stuff and rub the letters on your spines right off. (Old one-of-a-kind-doll maker trick. It works for barbie eyes and tattoos. And yes, barbies come with tattoos these days...) Now look at the spines on your box, too new looking? One worn more than the rest? Well distress (actual theatre term there) the other spines to the desired aged look by rubbing a remover loaded cotton ball all over the spines. I caution you though, that nail polish remover is strong stuff and will start to take off the color of the spine, so think obscure more than remove for the letters, most of the time a small dent in the shape of the B or Q will remain anyway.
You are done! Now, go put them on the shelves.
If you want to do these for gifts, try to find several different sets and use one of each spine on each box. Just keep in mind the heights need to be similar, and to use the shortest cover to glue in the middle. Oh and be careful who you give them to... you will have to account for having destroyed those books, lol.
Really tall and wide encyclopedias can be used to hold back issues of magazines. For that you could do a two spine box. If you have more back issue magazines than that... what's in them is likely out of syle!
Those with nice handwriting may want to get gold or silver pens and make up titles for the spines to fill in where the old titles have been removed. You could make it fit what you want to put in the box, pretend to be a classy literature affectionado, write naughty things in other languages, what ever floats your boat!
Most of all, enjoy!
Oh and you may want to concider NOT destroying one of those sets of encyclopedias, just in case we have an EMP event that takes out google. Or if anyone calls you on destroying the other set you can say, "But I have a real set, too! The thrift store was going to throw them away! So I took BOTH! I SAVED them!"


