


It's amazing what you can do with a few slices of 2x4 and a trip to the craft store.
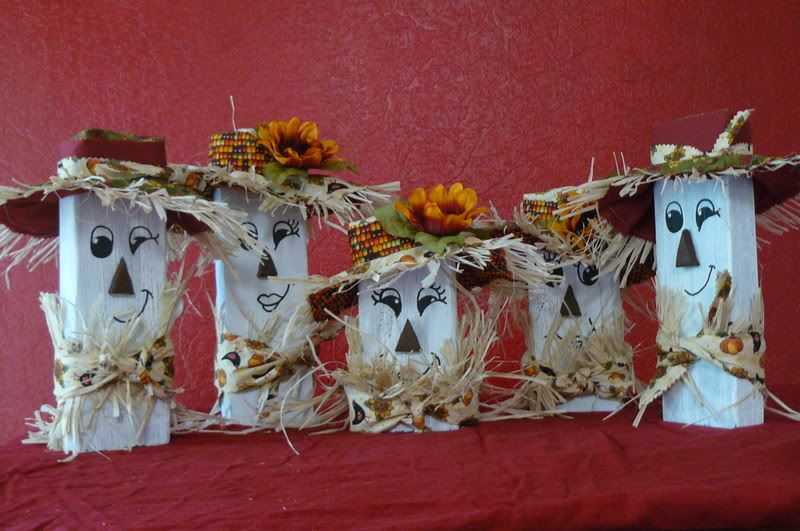
I call these "Dress-up-blocks" but I'm sure the clever person who originally came up with them had a different name for them. I did one for a ladies meeting at church a few years ago and decided to make some to give away as presents this fall. When we made them before we had little stocking caps and scarves to go with the carrot noses.
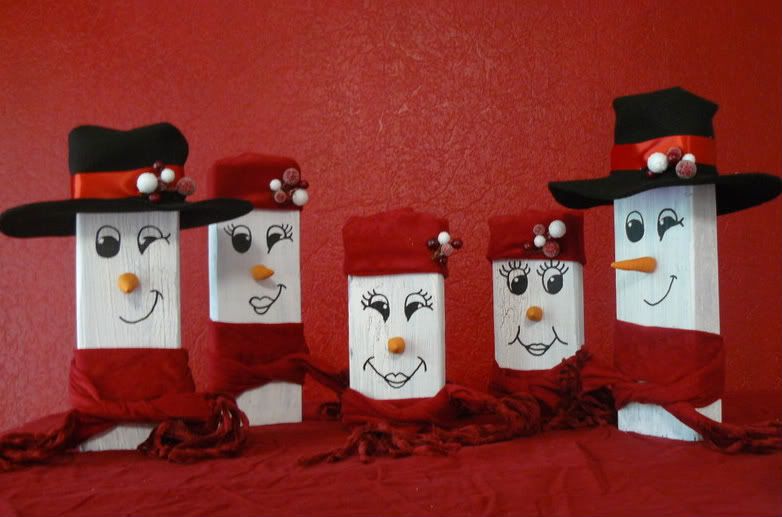
I've expanded upgraded a bit from there. This group has 3 outfits each. They can be scarecrows all fall, ghosts for Halloween, and snowmen at Christmas. Back when I made my first I came up with the idea to make one eye wink, and this time added the full grin with squinched eyes look to one. All those hours doodling in class seem to have paid off. Once again I took someone's great idea and improved upon it. This practice tends to scare people away, which is sad because once you get over my creativity I can be a really nice person. Honest!
Okay, now for the directions. (Because I KNOW someone will ask.) I'm not going to step by step you through all the outfits, but I'll give you enough to get rolling.
You will need:
- Time, lots of it, and if you are making the ghosts they dry 24 hours... so no table for 2 days kind of time.
- A dime, in addition to the money you are spending on this.
- 2x4, and get a nice straight, smooth one for your own sake. (splinters stink)
- Acrylic paint: black, white, brown, orange, and CRACKLE
- Painter's pen, black
- Sculpey, for the noses. You can get different colors and scratch the colored paint from the list, or you can get white and paint after baking. Me? I have about... 3 lbs of white in my craft closet.
- The little cylinder shaped wooden pegs used for joining wood. Just ask the burly guy at Lowes. You can also buy a dowel and cut pegs, if you reaaaaaalllly want to.
- Paint brushes, toothpicks, sandpaper, hot glue & gun, table protection, tin foil
- A nice chopsaw for cutting the wood, or use your feminine charms to get the burly guy at Home Depot to cut your wood in 8 through 12 inch blocks, or con someone's husband into doing it. Personally, I'm in love with my miter/chop saw. It's hot, way hotter than the guy at the store.
- Drill and bit to fit the wooden pegs, and make a test hole on scrap wood, please.
- Half of the craft store for making the outfits. I used felt AND sticky back felt, 5 different fabrics, raffia, Christmas garland, fake flowers, cheese cloth, liquid starch, yarn... whatever makes your eyes twinkle and that wicked little grin cross your face.
The process (and you thought the shopping was fun)
Blocks:
- Cut up a 2x4, if you do not have a nice miter box chop saw, find someone who does. You do not want them toppling. Mine are 8-12 inches high. The shortest one is kind of hard to dress.
- Sand away the splinters. Dust off the sawdust.
- Paint them black, let dry.
- Put on a coat of crackle paint, let dry.
- Slather on a layer of white paint, the thicker the coat, the better it crackles. Do not second coat, and try to go in one direction while slathering, let dry.
- Use a dime on paper to make a circle. That circle is the dark part of an eye, so move the dime up a bit and draw in the oval. Make a template of where you want the nose hole and eyes to go. Cut it out and transfer by tracing the holes onto the block w/ a pencil.
- Use a paint pen to draw the eye, let dry.
 If you want a wink, make a curve from 7 o'clock to 3 o'clock on the oval of the eye, extend to make wrinkles.
- Use a toothpick and white paint to make the twinkles.
- Draw on a smile.
- Drill the hole for the nose.
Noses:
Shape out of Sculpey, and insert the peg in back. Bake according to the package directions, paint.
Snowmen can have carrots or buttons, Frosty had a button, and I’ve never seen that IRL, so I do carrots.
Carrots: shape a cone, use your fingernail to put lines like the winkles in a carrot. If in doubt, go get a carrot out.
Ghost noses: Have fun, get a little crazy; ghosts get to have humorous noses.
Scarecrow noses: I opted for brown triangles, but if an evening on google image search leaves you with another idea, I will not be offended.
Outfits:
Okay, so this is really the hard part, and I’m afraid I’m not going to be able to describe it all. So I’ll give you this.
Felt hat:
Brim: Take a sheet of sticky felt, cut it in half across the width. Center a 2x4 chunk and trace. Cut a shape like this >-< in side the rectangle. Then peel off the paper everywhere else but inside the rectangle and place another layer of felt on the adhesive side. Open up the rectangle and cut it out on the non-sticky side leaving the papered tabs only. Then flip them through so the paper faces the outside.
Top: Cut a rectangle for the top part of the hat. Put it around the head, make it a little loose, then fold the top in and glue felt to felt so it looks like a cap.
Finish: When dry remove thye cap and then take the paper off the tabs on the brim. Stick them to the inside of the top of the hat. If needed add a little glue or stitch. Add a ribbon.
Ghosts: Liquid fabric starch and cheese cloth. Just make the shape you want out of aluminum foil as kind of a hat on your block, put a layer of foil over it all to protect your painting, cover w/ soaked cheesecloth, let dry. It’s easier than it looks.
Good luck!
5 comments:
Wow! Those are cool!
These are cute. I like the 2nd ones best!
Stopped by through mormonmommyblogs.
UGH! I so wanted to find the time to make these. sigh oh well.
these are super cute
Post a Comment