I know it's not here yet, but I'm in the preparation stages (if in doubt why, read my other blog). I'm going to keep editing this as I add things, I have split this one off as it is so involved.
This year Tali is going to be a dragon. I like the challenge of doing a dragon costume.
This year Tali is going to be a dragon. I like the challenge of doing a dragon costume.
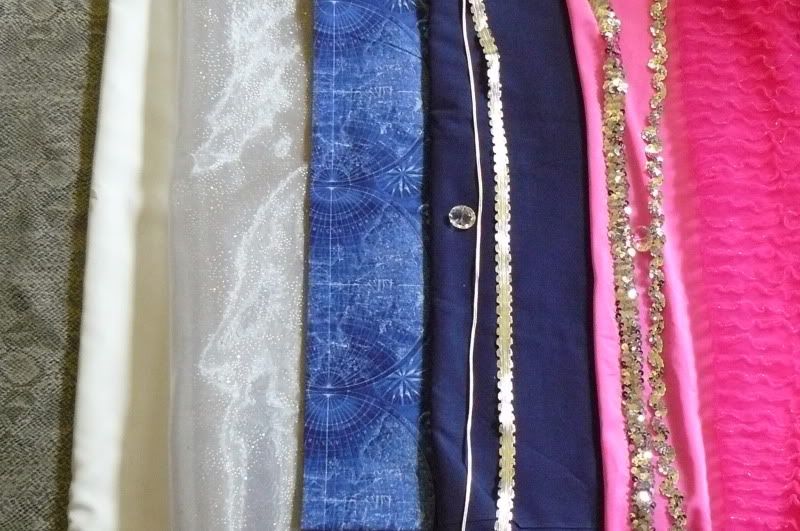
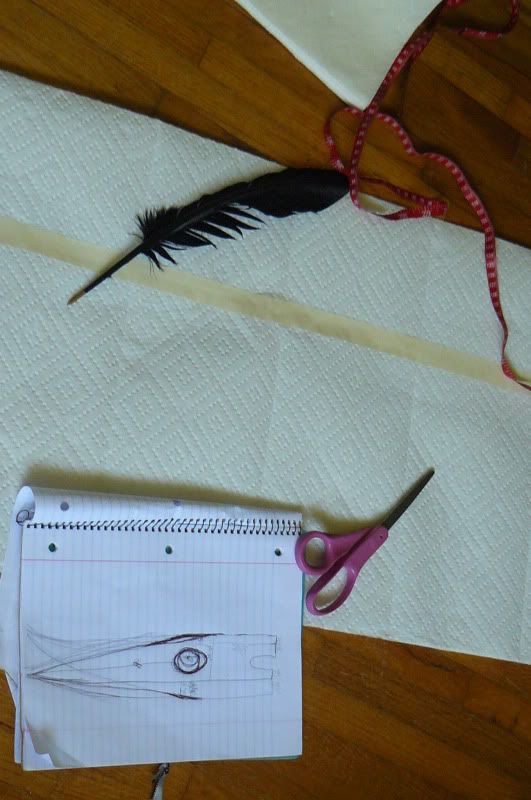
So here are the fabrics for all the costumes:
And here is the concept drawing:

I have a personal rule when making costumes. "Do what scares you first." So I started on the dragon head right away. I'm also worried about how to put together the haunches and tail, but that's simmering on my mental burner and may be there a while before I make a cut. I need to get it fully figured out so I don't waste fabric.
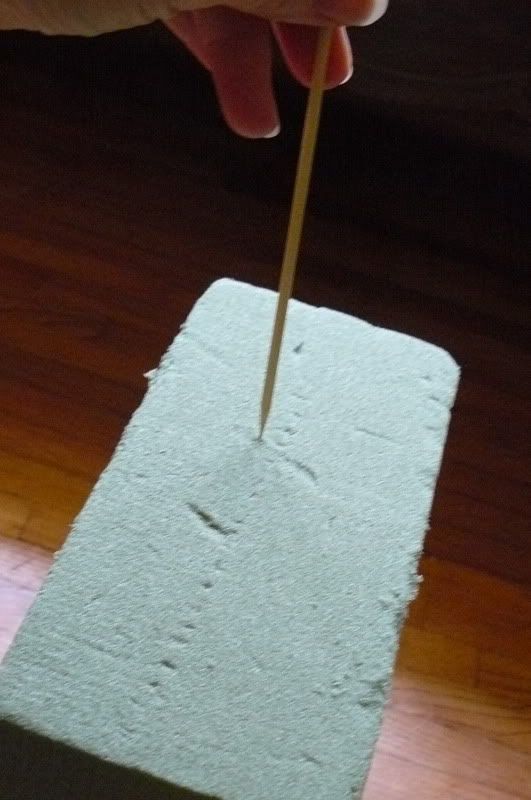
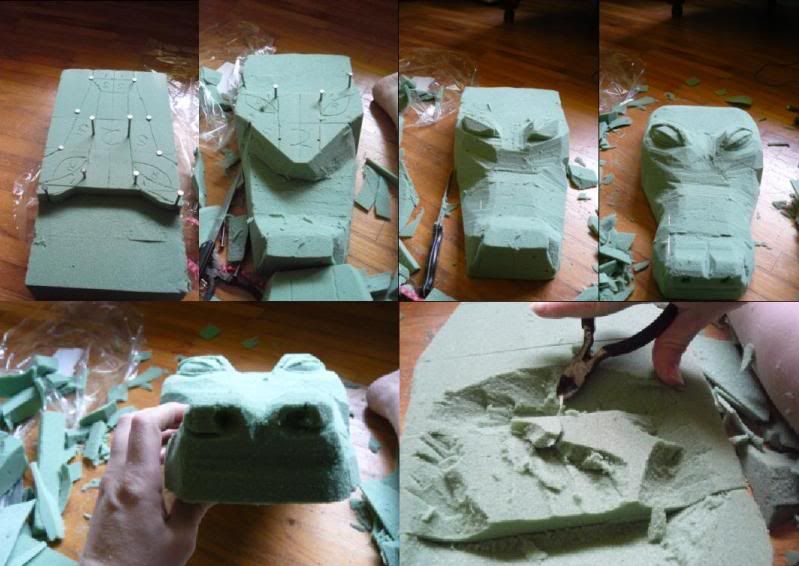
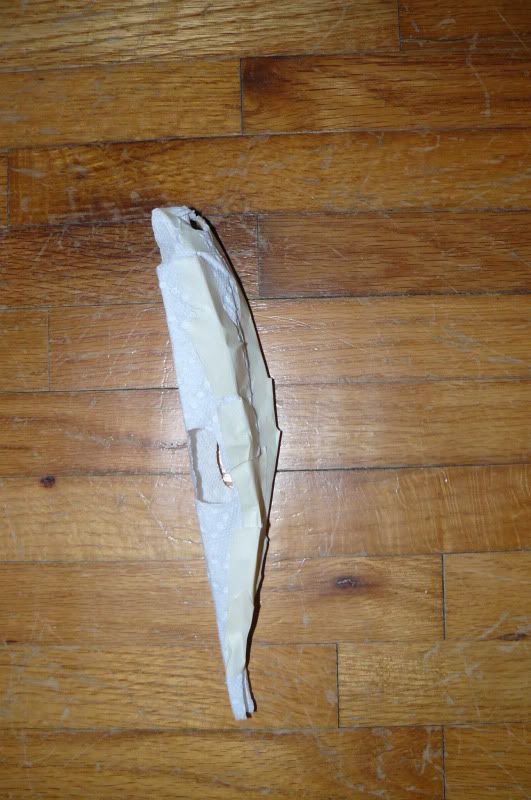
For the dragon head I purchased a pack of floral foam for $2. I glued the blocks together to make carving easier.

I have a personal rule when making costumes. "Do what scares you first." So I started on the dragon head right away. I'm also worried about how to put together the haunches and tail, but that's simmering on my mental burner and may be there a while before I make a cut. I need to get it fully figured out so I don't waste fabric.
For the dragon head I purchased a pack of floral foam for $2. I glued the blocks together to make carving easier.
Then I put some bamboo skewers in for strength.
I studied some pictures of the dragon head shape I like and sketched it out with a crochet hook.
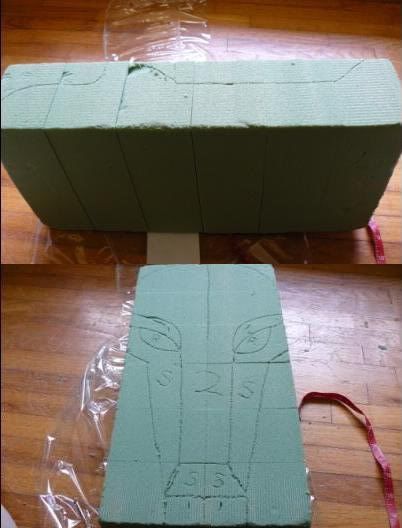
I started carving (note: if you do this, wear a mask and goggles, you don't want that stuff in your eyes and lungs). This was done with straight edged knifes. Then I hollowed out an area to sit on top of the head and cut the skewers where they got in the way. Then I added some more skewers for more strength.
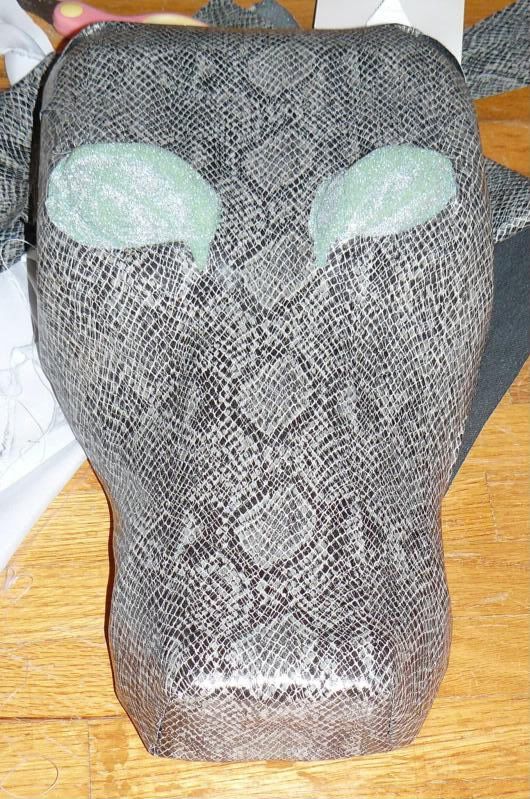
I cut a strip of the snakeskin looking vinyl and carefully placed holes for the eyes. I wrapped the head, pinning underneath and making notches to get the fit right. The pattern of the vinyl helped mask the edges where it overlapped in back and front. Then I stitched on the bottom.
I cut a strip of the snakeskin looking vinyl and carefully placed holes for the eyes. I wrapped the head, pinning underneath and making notches to get the fit right. The pattern of the vinyl helped mask the edges where it overlapped in back and front. Then I stitched on the bottom.
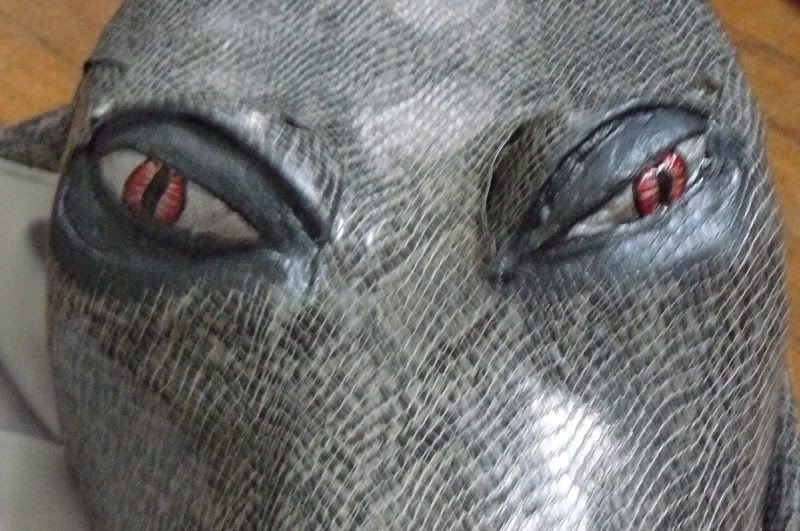
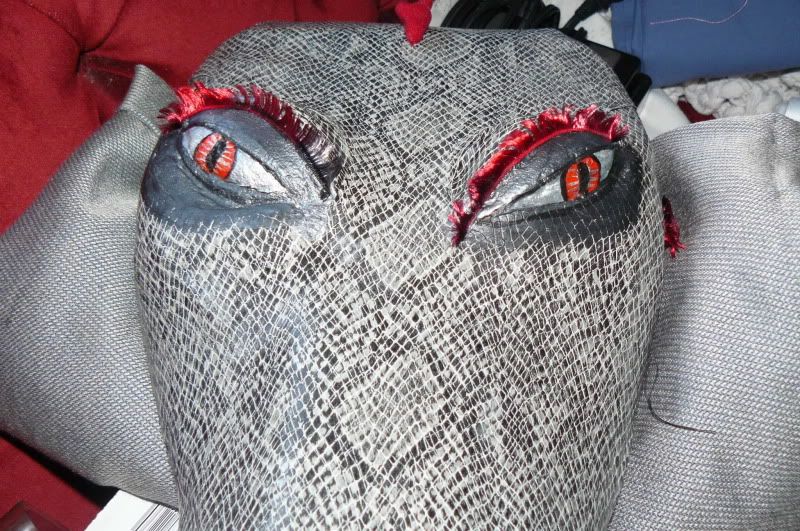
I needed to finish the eyes, so I glued on a piece to the back of each eye, then painted the front with glue. The glue has a lower water content and keeps the paint from making the floral foam turn to mush. It also creates a good painting surface, which is why one should always get paint-able glue. After the glue was dry (okay, it was about a week, life got in the way) I painted over it with acrylic paint and sealers. Thankfully I paid attention in the one art class I took in high school so this was not a challenge. Thanks Mrs. B. Tali wanted red eyes, to match the red ridge and tail tip she wants, and I did accents in silver and black for obvious reasons.
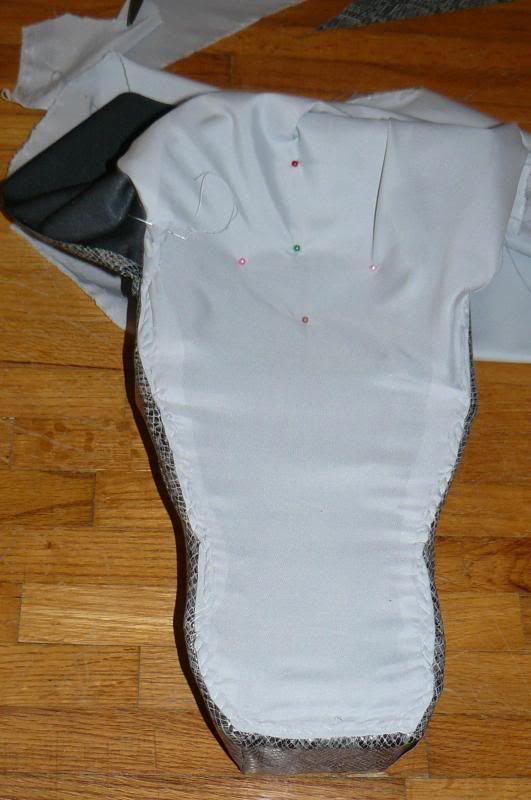
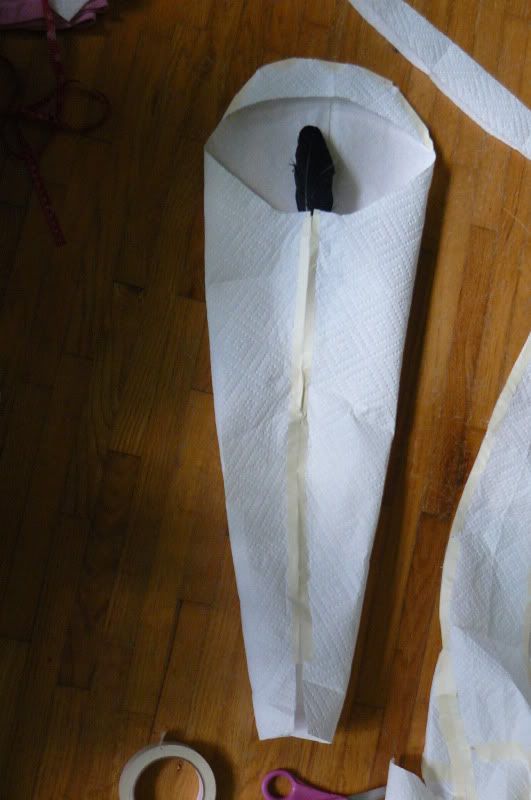
As far as the body, I like to do mock-ups in paper towels. I know, professionals use muslin, but I'm not wasting money like that, lol. So I use papertowels and tape. I spent a whole day thinking, sketching, measuring, cutting, and taping. Then when I tried the mock up on her it needed some adjustments, but that is what a mock up is for. The initial sketching and tiny mock up:
The leg with the additional piece to make it stand away from the body, and the quill inside, because I love my quills:
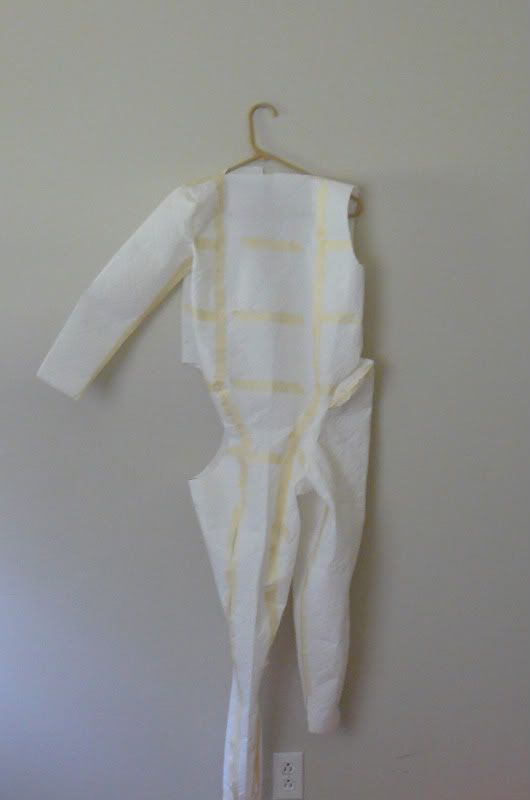
The finished mock up(Why one arm and one leg? Because you don't need a full suit, just enough to try the fitting of each piece):
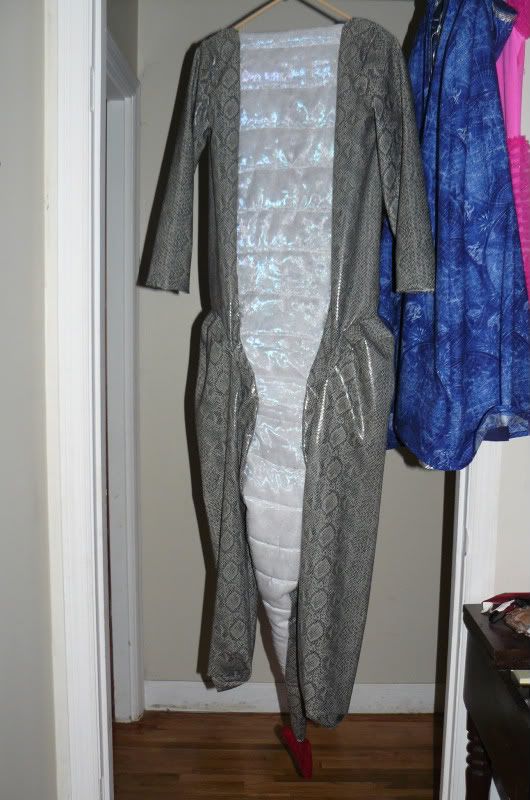
These are the outer pieces of the dragon costume, they were lined to give support.
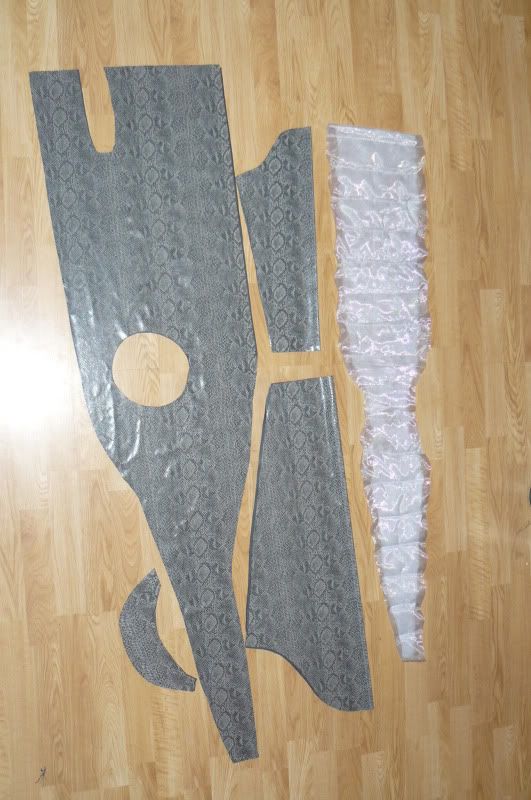
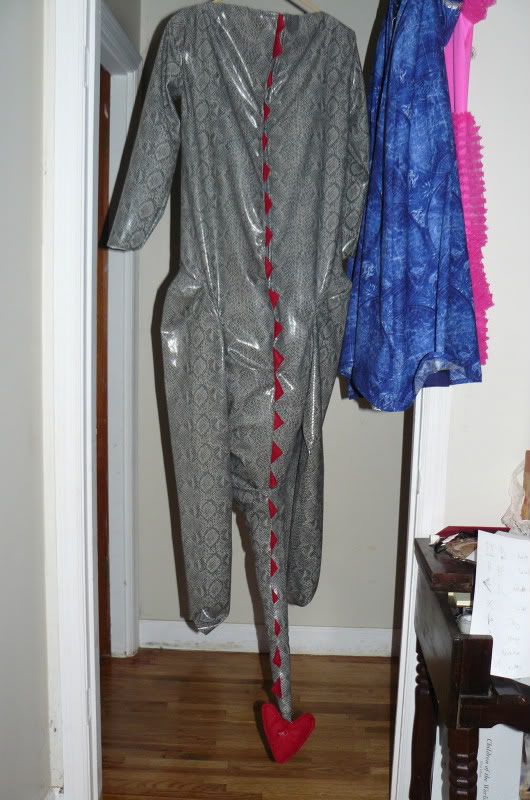
This is it, sewed together:
I also cut 3" squares out of red fabric to fold in to quarter triangles and put along the back. The zipper goes down the back.
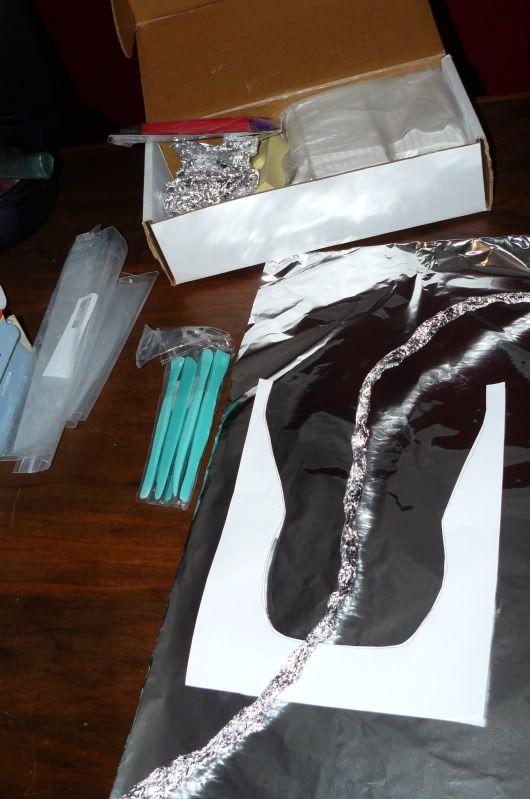
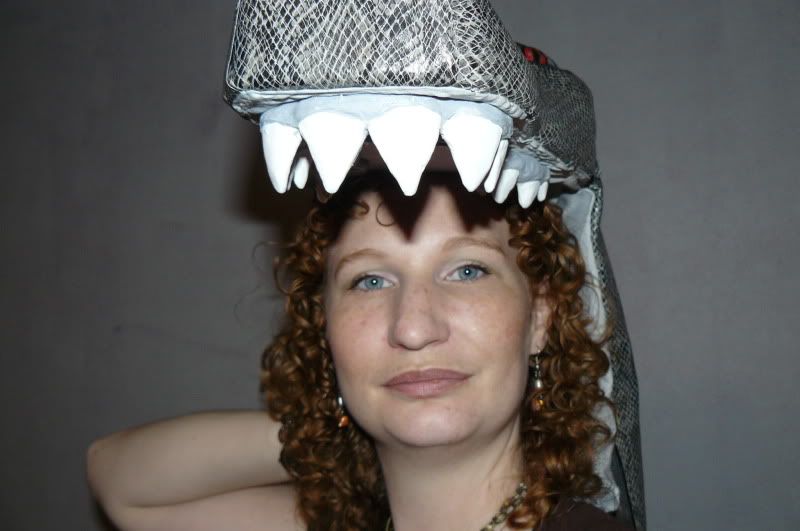
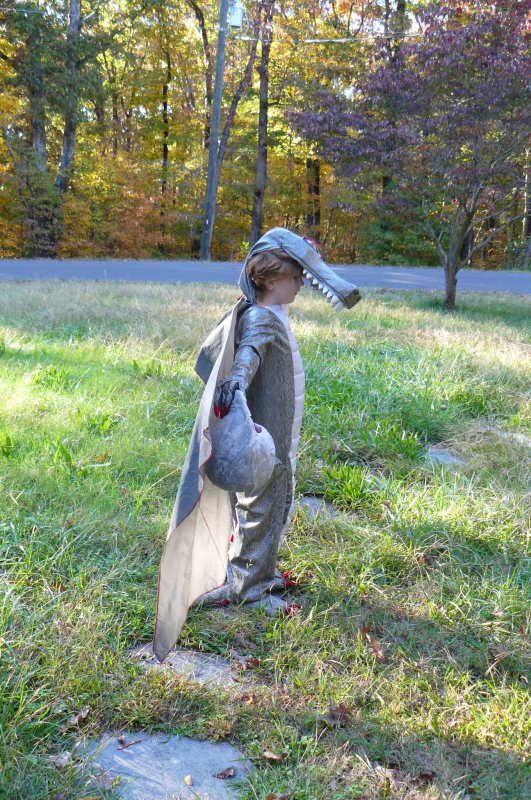
I decided to tackle the teeth one day when I had the morning off of work. I made them out of sculpey with an aluminum core, baked them, painted them, and screwed them into the head.
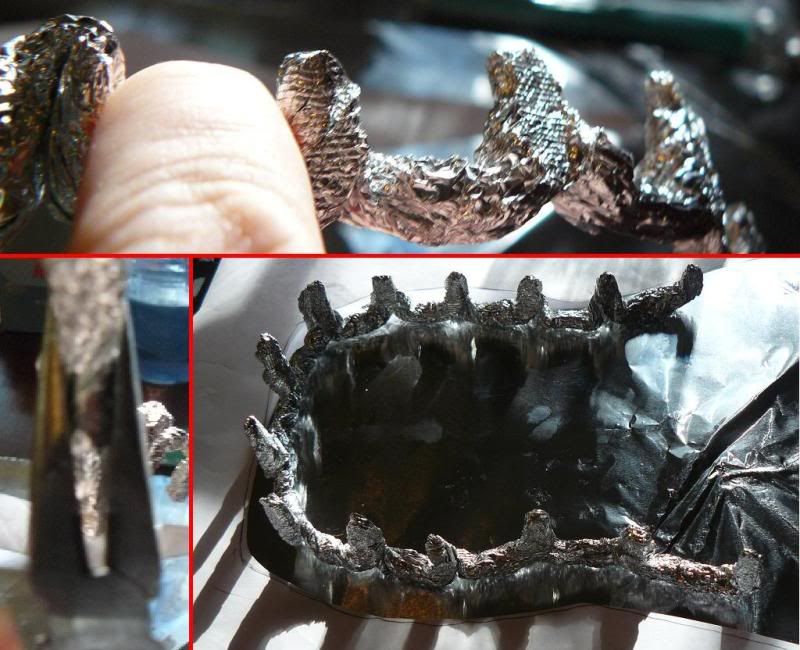
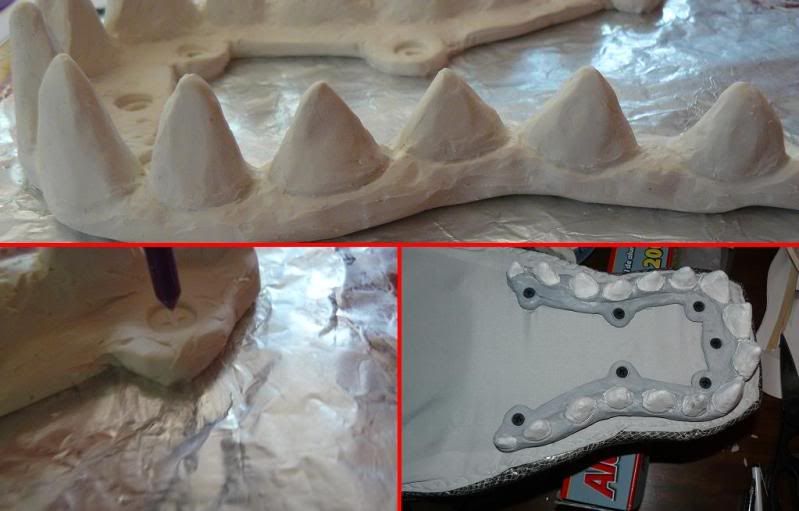
I think I make a pretty good dentist, lol.
I also decided to put eyelashes on the eyes, to compliment the tail, and because the yarn was calling to me plaintively from the basket, and who can resist plaintive yarn?
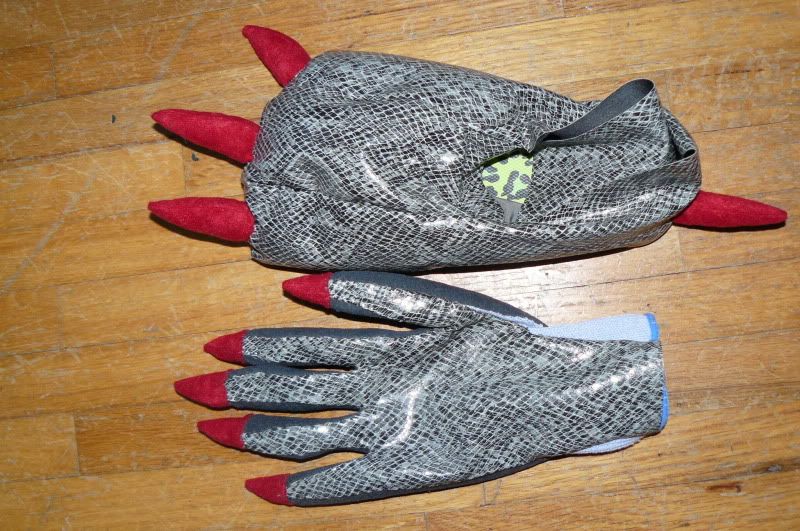
We found some gloves in the fishing department, and I hand stitched on some claws and skin backing. My fingers may never forgive me.
I would go into detail about how I made the feet slippers out of flip-flops, fabric, batting, and pins, but mylanta it was complicated. Thank goodness I paid attention to how my cabbage patch dolls were made. (See mom it was a good investment!)
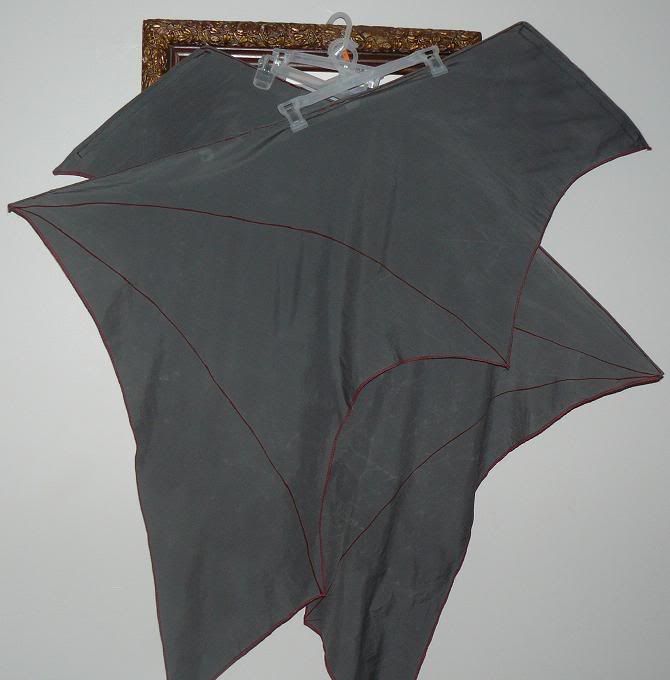
The wings are fabric, wire, paint, velcro, and lots of starch. I poured it in our spray bottle undiluted and went to town on the wings as they hung outside. They dried wonderfully stiff and keep this shape when horizontal. The wire runs from the base of the end that attaches to the back up to the point at the wing top. The rest is all starch. They are very lightweight and will be gloriously in the way as she goes to the parties. I can't wait!
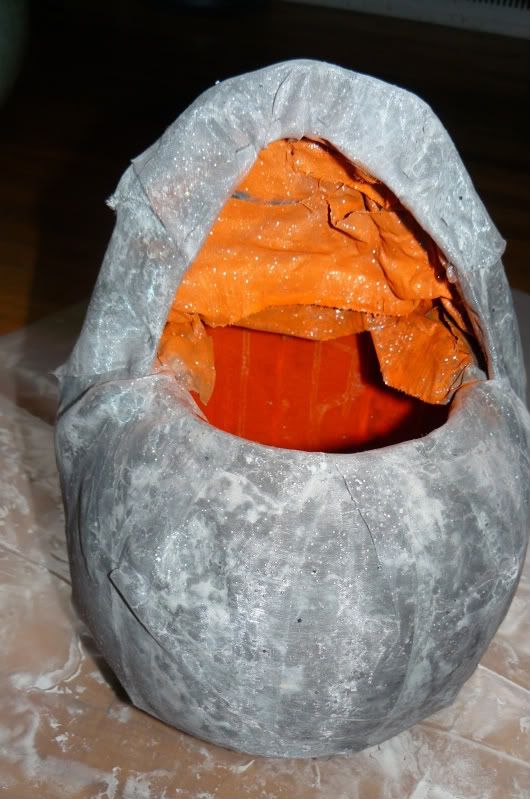
This is the candy bucket, she wanted an egg shaped one. I built it around a pumpkin bucket. I should have done a balloon as the base for the fabric-mache (not paper) but wouldn't you know I didn't have a balloon? Ah well, it works.
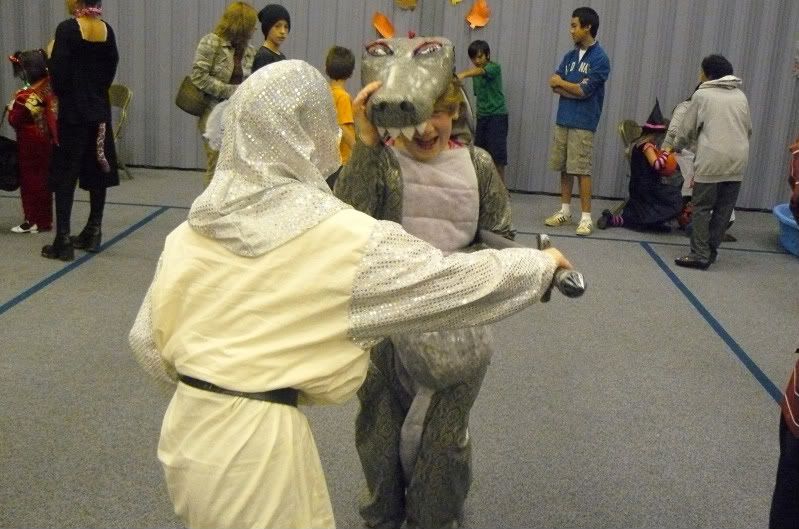
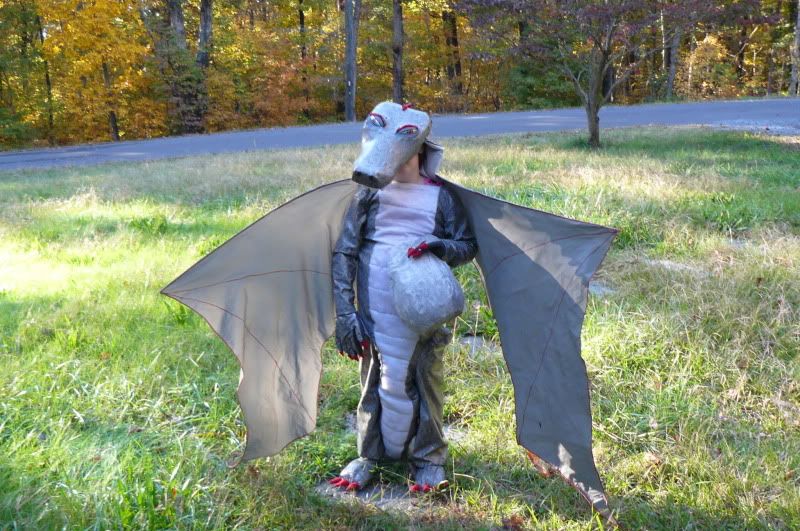
Here she is in the finished costume!
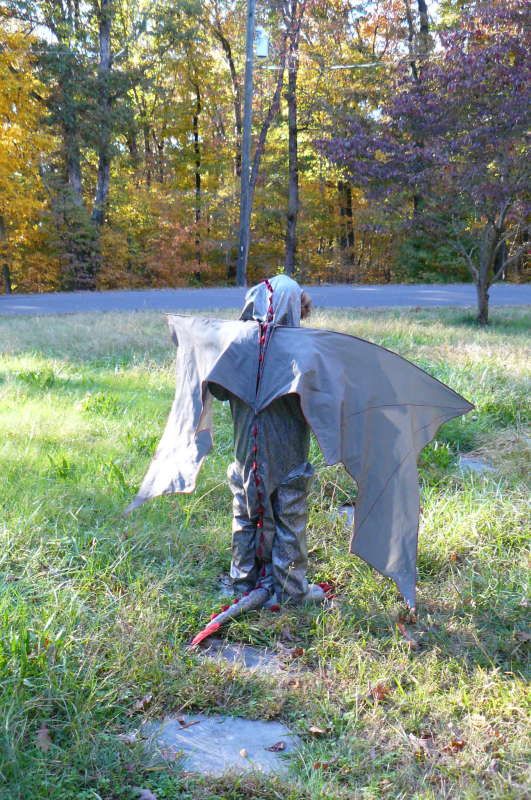
We had a knight attending the party at church, so they had a bit of fun, lol.